How To Keep Your Invisalign In Good Shape

Invisalign Cost Las Vegas can correct some orthodontic issues, including overcrowding and gaps between teeth. However, the effectiveness of the treatment depends on the patient’s compliance.

Patients must wear the aligners for about 20 to 22 hours a day and remove them when eating or drinking. The trays also must be regularly cleaned to avoid staining.

Invisalign is a convenient teeth-straightening solution for individuals who do not want to deal with the inconveniences and restrictions of traditional braces. Invisalign trays are removable, so patients can eat whatever they want without fear of damaging their appliances or suffering a setback in their treatment plan. However, certain foods should be avoided during this time, as they can cause pain and discomfort in the mouth. Sticky and chewy foods, like gum, should be avoided as well, as they can leave residue that may increase sensitivity or interfere with the movement of the teeth. It is also important to avoid hard or crunchy foods, as these can damage or chip the aligners and may require them to be replaced earlier than expected.

When it comes to eating, there are no food restrictions with Invisalign trays, but there are some things to be mindful of. It is recommended to brush and floss before consuming any food, as it will help to remove any particles that could linger in the mouth and cause decay. It is also important to remove the Invisalign trays before eating, as they will need to be clean in order to be effective.

It is best to eat soft foods like soup, yogurt, eggs, and bread, as these do not require much chewing. It is also important to drink plenty of water or unsweetened beverages, as these will be more beneficial to the teeth than sugary ones.

It is also recommended to avoid alcoholic beverages, as they can damage the teeth and exacerbate the effects of Invisalign. If you do choose to enjoy an alcoholic beverage, it is recommended that you wait at least 30 minutes before putting the Invisalign trays back in place. This will give the mouth time to recover from the acid and prevent any unwanted discoloration of the teeth. Keeping the Invisalign trays clean is also essential, as it will reduce the risk of them getting stuck in the teeth and causing pain or discomfort. Regularly brushing and flossing will help to keep the aligners clean, as will rinsing them with warm water.

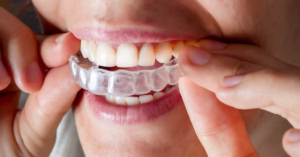
Clear dental aligners are made to fit the unique shape of your teeth, so they’re more comfortable than traditional braces. They apply a gentle pressure on your teeth to help shift them into the correct positions. You may experience mild pain or discomfort at first, but this is usually temporary. You should only remove your aligners to eat, drink, brush and floss, or for special occasions.

Your orthodontist will give you a new set of aligners about every two weeks. You might notice some initial discomfort when you start wearing a new set, especially if it’s your first time with them. This is because your teeth will have moved some since the last time you wore them, so there will be more pressure on your teeth to shift them back into place. This pain is most likely to happen within the first week of wearing your new aligners.

Once you get used to the feeling of your aligners, you’ll hardly think about them at all. They’ll become a part of your everyday life, just like your other dental appliances. It can take a while for your mouth to adjust to talking with them in, and you might have some trouble getting the words out sometimes.

You might also find it difficult to fully seat your aligners in your mouth. This can be due to them being new or if you’ve been taking them out too often. There are soft chewies available to help you make sure that your aligners are completely inside your mouth.

If you take out your aligners too often, it can cause them to lose their shape and stop working. When this happens, your teeth will naturally drift back to their old positions, which will slow or even halt your progress. You can avoid this problem by making sure you’re wearing your aligners at least 20 to 22 hours a day.

Invisalign is a great option for people who want to straighten their teeth without the hassle of braces. There are several different types of aligners available, so talk to your orthodontist about which one is right for you. They’ll be able to recommend the best type of Invisalign for your specific needs.

Invisalign fixes common orthodontic problems like overbite, underbite, crowded teeth, gaps, and more through a series of clear aligners (trays) that no one can see. They’re also removable, so you can eat and drink what you want while in treatment. Plus, you can brush and floss normally to maintain healthy gums and teeth.

Invisible aligners work by gradually shifting your teeth into place with each new set of trays. They’re customized to treat your specific dental issues, which can vary between individuals. Some people may experience mild pain during this process, but this is normal and will subside as your teeth move into their correct positions.

You’ll need to brush your invisalign trays daily to keep them clean. Make sure you use a soft-bristled toothbrush and toothpaste that doesn’t contain baking soda, which can damage your trays. You can also buy special cleaners for invisalign that are similar to denture cleaning tablets and work by dissolving in water. These are much easier to use and provide a more thorough clean.

It’s also important to rinse your trays with warm water after every time you remove them. This will help prevent stains and reduce the buildup of harmful bacteria. It’s a good idea to do this twice a day, around the same time you brush and floss. If you forget to wash your trays regularly, it can lead to toothache, bad breath, and even permanent tooth damage caused by bacteria that eat away at the enamel.

Another problem some patients have with invisible aligners is that they can cause a slight lisp during the straightening process. This is because your tongue and cheek have to adjust to the foreign object in your mouth all the time. The lisp typically goes away once you’re finished wearing the trays.

Lastly, it’s important to remember that your aligners are not meant to be chewed. Chewing on them can damage the plastic and cause dents or breakage. It’s also a good idea to store them in a case when you aren’t wearing them to protect them from food and drinks that can stain the tray.

When you’re wearing invisalign, it is crucial to keep them clean. Failure to do so can cause a variety of issues. For example, food particles can get trapped between the aligner and your teeth, leading to bad breath and potential gum disease. It is also important to regularly soak your aligners in a diluted mouthwash or denture cleaner to keep them free from bacteria. Poor oral hygiene can lead to a build-up of plaque and tartar, which will require more expensive dental procedures to remove.

Although it may seem daunting to have to follow a strict cleaning routine, it is important to do so in order to get the most out of your treatment. If you have any questions or concerns, make sure to speak with your dentist or orthodontist, as they will be able to provide you with the best advice.

Some cleaning methods should be avoided, as they could damage your aligners. For example, abrasive materials can scratch the surface of your aligners, and this can allow bacteria to hide. Also, soaking your aligners in hot water can warp them, so it is important to use lukewarm water instead. Finally, bleach is far too harsh for your aligners and can damage them.

A good cleaning regimen should involve brushing your aligners twice a day and rinsing them when you’re finished. It is also a good idea to brush the interior of your aligners, as well as the exterior, to keep them clean and hygienic. After brushing, you should rinse them thoroughly with lukewarm water.

While there are many cleaning products available, it is best to stick with those that are specifically formulated for use on invisalign. These cleaners can help to remove any stubborn stains that are difficult to remove with regular soap and water. You can also purchase cleaning crystals that are designed to work safely on your aligners, so you don’t have to worry about damaging them with other cleaning methods.

Rinse your aligner case regularly is also a good idea, as mold can grow in a dirty case. It would be best to wait until it is completely dry before putting your aligners back in.

Some Things To Know In Removing Asbestos

Generally, only Asbestos Removal Perth WA should handle materials that could contain asbestos. When disturbed, asbestos releases needle-like fibers that can cause lung disease.

Before work begins, get a contract specifying the work plan, cleanup, and federal, state, and local regulations that the contractor must follow (such as notification requirements and asbestos handling and disposal procedures). Ask about accreditation.

asbestos removal

Before starting to work with asbestos, a professional inspection must be undertaken. This is especially true if the building you are working in contains a lot of asbestos or if any demolition work is being done on the structure. Asbestos can be found in a variety of materials, including textured paint, floor and ceiling tiles, shingles, insulation, pipe wraps, and some roofs. It is important to note that there is no known safe level of exposure.

It is recommended that the entire area to be worked in be surveyed and cleaned by professionals before beginning any work. A good cleaning can prevent the spread of asbestos fibers and will also remove any dust particles that have already been released into the air.

If a building contains significant amounts of asbestos, they must develop an asbestos removal control plan before work starts. The control plan must contain a risk assessment, cleaning methods, and containment details. They must also train workers about the risks associated with asbestos and how to identify and manage them. This includes specialized training and licenses for asbestos assessors, removalists, and supervisors.

Those who are not trained should not be allowed to work with asbestos. Inhaling asbestos fibers can cause a range of health problems, from respiratory irritation to mesothelioma, a fatal cancer that affects the lungs and chest wall.

All tools used in an asbestos removal project should be fitted with exhaust ventilation dust control hoods. All employees must wear disposable coveralls with fitted hoods that prevent penetration of asbestos fibers (type 5 category 3), impermeable gloves, gumboots, and shoe covers. Eye protection is also required. Facial hair mustn’t be worn to ensure the proper fit of the respirator.

The work area should be closed off from areas that don’t require abating. Warning signs and barriers should be put up to ensure that people avoid the area. All vents must be covered to prevent contaminated air from entering, and all openings should be sealed with plastic sheeting. All rubbish must be wetted using a fine mist of water and double bagged before being removed from the site and disposed of in an appropriate asbestos landfill.

If asbestos-infected material is to be removed, the process must take place in a decontamination area. The work should be conducted by a certified asbestos abatement contractor who follows state and local laws for notification requirements, removal, and disposal. Upon completion, the abatement technician will thoroughly clean all surfaces, floors, ceilings, and equipment in the working area, and they’ll perform extensive air and material testing to confirm that asbestos levels are below OSHA regulations.

In addition, workers should follow strict decontamination procedures to protect themselves. They must wipe down all work clothing, disposable items, and tools before leaving the work area. Any contaminated materials and cleaning rags should be double-bagged in 6-millimeter plastic bags with a sealant and properly labeled before disposal. These bags should be placed in sealed and labeled, leak-proof, heavy-duty garbage containers that are only to be disposed of in a landfill designated for asbestos waste.

Non-friable asbestos-containing materials (ACM) like floor tiles, roof shingles, and exterior siding do not release harmful fibers when they’re disturbed, but friable ACM such as asbestos pipe insulation, boiler lagging and blown-in insulation can. These materials can be pulverized, crumbled, or reduced to powder by hand pressure when dry and can cause inhalation hazards when they’re airborne.

While no level of exposure to airborne asbestos is known to be safe, medical, environmental health and safety organizations warn that breathing in loose, airborne fibers can put you at risk of developing an illness. This is why it’s critical to minimize the release of airborne asbestos during home renovation projects by covering all exposed surfaces and wearing proper personal protective equipment (PPE).

PPE includes coveralls, rubber gloves, eye protection, and a respirator. Several pairs of durable, disposable coveralls with built-in booties should be worn by each person who’ll be working in the removal area, and each set of coveralls should be wetted before a worker exits the work zone. Before each session, lay down an entrance/exit “transition zone” strip of plastic along the wall where the removal will be done, and after each work session re-wet all coveralls, and wipe down and remove rubber boots, gloves and goggles.

Once the asbestos has been removed, it must be disposed of correctly. Unlike other hazardous waste, asbestos cannot be included in household rubbish collection services and must go to a specialist site that is licensed to accept it. It is often best to leave the disposal of asbestos waste to a professional, as it requires careful handling and specialized transport equipment that can prevent any further contamination during the journey.

An experienced asbestos removal company will ensure that the waste is double-bagged and labeled before being transported to a landfill site. This is to minimize any risk of the fibers escaping and infecting the surrounding environment. It is also important that the waste is kept separate from other materials to minimize the risk of cross-contamination. In these environmentally-conscious times, it is increasingly popular for asbestos to be recycled, rather than thrown away. This process involves heating the asbestos to destroy its harmful properties, resulting in a non-toxic material that can be used in a range of products.

The waste must be wetted down before it is moved, to prevent any airborne fibers. If this is not done, the waste can cause serious harm to people, animals, and the environment. It is also vital that it is not broken into small pieces, as this will increase the risks of airborne asbestos.

Before the contractor begins work, you should make sure they have a written contract specifying the work plan and cleanup procedures. You should also contact your state and local health departments, the EPA’s regional office, and the Occupational Safety and Health Administration’s region to find out what regulations the contractor must follow (e.g. notification requirements and asbestos disposal procedures).

Ideally, the contractor should wet down the asbestos with a hand sprayer before removing it. This will prevent the asbestos from releasing airborne fibers during removal and will also make it easier to clean up.

If you suspect improper asbestos removal has taken place in your home, you have a right to report it. You can report it to the Environmental Protection Agency, the Occupational Safety and Health Administration, and your county and/or state Department of Environmental Quality.

A qualified asbestos professional can assess whether your home has asbestos and, if it does, will safely remove it. A licensed contractor will follow strict guidelines to prevent releasing airborne asbestos fibers. They will wet the materials before attempting to remove them, use a “negative air” machine that draws the air in from the abatement area through a series of filters (including HEPA) and exhausts it outside the affected areas, use a special decontamination enclosure to allow workers to leave the work site without touching contaminated items and regularly test the air to ensure no elevated levels of asbestos are being released.

If the materials are in good condition and not disturbed, asbestos exposure is very low. However, if they are sawed, sanded, or scraped, or the glue in floor tiles is broken up, tiny asbestos fibers can become airborne and be breathed into the lungs.

The human body’s natural defense systems will remove the majority of these minuscule fibers, but some can bypass these defenses and lodge deep in the lungs. This can cause serious health issues including lung diseases such as fibrosis and mesothelioma, respiratory problems, and gastrointestinal illnesses.

If you are considering doing some minor repairs or renovating your property, check with a licensed asbestos consultant to ensure that it is safe to do so. Major repairs and renovations should be left to professionals trained in the methods of asbestos removal.

Asbestos is found in a variety of building materials and products, from floor tiles to roof shingles to exterior siding, cement, automotive brakes, and acoustic/structural insulation. If these materials are damaged, the asbestos fibers can become airborne and ingested, causing health hazards. If you have asbestos in your home, never attempt to saw, sand, or scrape it yourself, as this will release the asbestos fibers into the air. Instead, contact a licensed asbestos contractor to remove it safely. They will be able to recommend alternative ways of repairing or replacing the asbestos material and will ensure that all necessary safety procedures are followed. They will also provide you with the proper documentation and disposal instructions for your asbestos waste.

How to Prevent Leaking Pipes

Scranton Plumbers install, repair, and maintain pipes and fixtures for water, sewage, and heating systems. They need excellent listening skills to understand customer concerns and provide appropriate solutions.

Leaking Pipes

A running toilet, a leaky faucet, or a clogged drain are just a few of the plumbing problems that can arise in your home. But before you call a plumber, there are some things you should know.

A leaking pipe can cause significant damage to walls, floors, and ceilings. While a plumber will be required to fix the leak, there are some things you can do to minimize the damage and prevent water from leaking into unwanted areas of your home.

The best way to spot a leak is to look for puddles around appliances or fixtures. This is usually a sign that the seals have deteriorated and that the water is flowing where it shouldn’t be. You can also check the water meter in your home. If you notice that there has been a sudden increase in your water usage, this may be a sign of a leak somewhere in the pipes.

If you do find a leak, turn off the water supply to that area and try to clean up any standing water. Next, you can use a patch clamp or pipe leak repair clamp to seal the leak temporarily. These devices are available at any hardware store and can be used to easily repair leaks in metal or plastic pipes. Simply locate the leaking section of pipe and fold the inner sleeve of the clamp over it, tightening the screws until the leak stops.

You can also use a water pipe sealing putty to repair smaller leaks. This can be purchased at most DIY or home improvement stores and consists of two components that when mixed create a powerful sealant. Once again, make sure that the water supply is turned off and that the pipe or pipe is dry before using the putty. Once it has cured, you can turn the water back on and check for further leaks.

If you are unable to locate the source of the leak or if the problem is severe, call a plumber as soon as possible. They can provide you with further advice on how to repair the issue and can ensure that the problem is not exacerbated by further damage. They can also perform a full inspection of the plumbing system to identify other problems and potential issues that might arise in the future.

Pipes can be damaged by age, wear and tear, or even by accidents. Regardless of the cause, when pipes break, water damage ensues, which can ruin valuable possessions and create a serious health risk. If you notice a leak in your home or building, it is important to turn off the water supply as quickly as possible to minimize damage and prevent further problems.

A broken pipe that goes unnoticed can lead to mold, mildew, and other dangerous bacterial growth. These bacteria can be spread through air and water and can pose a threat to your family’s health. In addition, a burst pipe can also cause flooding, further damage your property, and result in costly repairs. The best way to avoid these issues is by regularly checking your plumbing for problems and addressing them as soon as you notice them.

If a damaged pipe is ignored, it can result in the formation of mold, mildew, and other hazardous microorganisms. The health of your family may be at danger due to these germs, which can be transferred by water and air. A burst pipe can also result in floods, additional property damage, and expensive repairs. The greatest defense against these problems is to routinely inspect your plumbing and take care of any faults as soon as you find them.

If your water shut-off valve is not easily accessible, there are a few things you can try to get the situation under control until a plumber arrives. Duct tape and plumber’s putty are a good choice for temporary fixes, but you should always have a plumber’s number on hand in case of an emergency.

If the leak is at a threaded joint, you can try tightening it with an adjustable wrench. Be careful not to over-tighten, as this can damage the pipe. If the pipe is old or damaged, it may not hold a tight grip and you should consider replacing it instead.

Using a pipe repair clamp is another quick solution for leaking pipes. You can find these at most hardware and plumbing supply stores. Simply place the rubber sleeve over the damaged area, then mount the pipe clamp, making sure it extends at least one inch past the damage on each side. It is important to tighten the clamps snugly, but not overly tight.

Using epoxy to repair a leaky pipe or joint is a more permanent fix. You can purchase epoxy at most hardware and plumbing supplies stores. It is important to clean the damaged area and make sure water can’t reach it before applying the epoxy. If you are unsure how to use the epoxy or are uncomfortable with the task, it is a good idea to call in a professional.

If you find that your showers are ice cold, or your water heater is constantly running, it may be time to call a plumber. A professional can inspect your system and recommend the best repairs.

Plumbers install and repair pipes, fixtures, and appliances that facilitate the distribution of water, waste, and air in residential and commercial settings. They use a variety of tools and techniques to work in tight spaces and confined areas. A plumber’s job duties also include interpreting blueprints and building codes to ensure that plumbing systems are installed according to regulations. They also diagnose and troubleshoot issues with clogged or broken components.

In both household and business settings, plumbers install and fix the pipes, fixtures, and appliances that enable the distribution of water, waste, and air. They operate in cramped and restricted locations using a range of instruments and methods. In order to guarantee that plumbing systems are established in compliance with rules, a plumber’s professional tasks also involve understanding construction codes and designs. Additionally, they identify and resolve problems with blocked or damaged parts.

Some plumbers specialize in specific fields or types of installations. For example, an industrial plumber handles large-scale piping systems and equipment found in manufacturing plants and power stations. Other specialties include gas line installation and repair, residential plumbing, and water heater repairs. Plumbers usually have a high school diploma and complete an apprenticeship program or earn a tradesman’s certificate.

Certain plumbers have specialized knowledge in particular areas or installation kinds. An industrial plumber, for instance, works with the massive piping networks and machinery that are present in power plants and manufacturing facilities. Residential plumbing, water heater repairs, and gas line installation and maintenance are among other areas of expertise. In addition to completing an apprenticeship program or earning a tradesman’s certificate, plumbers typically hold a high school diploma.

Leaking water from the side of a hot water tank often indicates that the unit is nearing the end of its life and needs to be replaced. To extend the life of your water heater, drain it regularly and take steps to prevent leaks.

You can try relighting the pilot light on your gas water heater if it is acting up. However, it’s important to read the safety manual before you attempt this task. There are real dangers associated with tampering with gas systems, and only a licensed plumber should attempt to do so.

If you notice that your toilets flush slowly or have a strange smell, the problem could be caused by a broken part. Most likely, the handle or flapper valve is clogged. A plumber will have the right tools and parts to fix this issue quickly and efficiently. A plumber can also replace your toilet if the damage is too severe to repair.

Sump Pump Maintenance

A sump pump removes water from a basement and discharges it outside the house. This prevents your basement from flooding during a heavy rainstorm.

sump pump

A professional should inspect your sump pump every two years. This includes checking the float switch and ensuring the pit is large enough. It also includes checking the discharge pipe for clogs and other problems. Contact Westfield Plumbing for professional help.

The float switch on a sump pump tells the motor when to turn on and off. If it gets stuck in the on position or becomes clogged, it can cause your sump to start and stop automatically at incorrect times and possibly damage your motor. Check the float switch regularly to make sure it isn’t stuck in the on position and that it can move freely.

A sump is a large underground basin that collects groundwater from around your home and pumps it out through a discharge line. It is important to inspect your discharge line annually for blockages or leaks that can cause the pump to fail and flood your basement. Examine the discharge pipe for cracks or other damage on the outside, as well as inside for signs of water and rust. If you notice any problems, it is best to have a professional plumber repair them as soon as possible to avoid a costly failure.

While you’re doing maintenance on your sump, be sure to clean the discharge screen on the bottom of the unit as well. This helps prevent debris from entering the pump and causing a breakdown. To clean the discharge screen, you will need to remove the pump from the basin, and carefully disconnect the discharge pipe leading to the outside of your house. If the pump is plugged in, you will need to unplug it and put it in a bucket or trash bag to protect yourself from getting sprayed with water and debris.

Once you have removed the pump, you can use a dry towel to wipe it down and degrease any extra grime that may have built up. You can also saturate the float switch in vinegar to help loosen any gunk that is stuck. Once the pump is cleaned, you can plug it back in and test it to see if it works properly.

When you plug the pump back in, you should hear and feel the motor start to run. If it doesn’t start, then the float switch needs to be repaired or replaced, and the pit must be cleaned out before attempting another test.

Check the Electrical Connections

A sump pump requires a bit more care than your average household appliance. It should be fully inspected, cleaned and tested at least once a year to make sure it works as intended. This includes removing the pump from the pit, checking the power source and cleaning the grate as well as the inlet screen or opening. It’s also a good idea to have a battery backup installed to protect your home against flooding in the event of a power outage.

The easiest way to test your pump is to simply pour water into the basin. It should activate when the float or pressure sensor rises to match the water level and begin pumping water out of the basin and into your discharge line. If the pump doesn’t turn on or shuts off frequently, it may be time to replace it.

Over time, the electrical components of a sump pump can wear out from continuous use. If you notice rust or corrosion on the parts of your pump, it’s important to clean them and lubricate the bearings. If you have a sealed pump, this isn’t necessary, but if yours is unsealed, it’s an easy step to take that can help prevent the need for repair or replacement down the road.

If you have a battery backup sump pump, it’s important to check the battery and replace it every seven years, or as recommended by the manufacturer. This is because batteries can wear out from repeated charging and discharging, forcing your backup pump to work overtime.

Your sump pump has two separate cords that plug into electrical outlets, one for the float switch and one for the motor. Unplug both and then plug only the motor back in. This will cause the pump to come on immediately if everything is in working order, letting you know that it’s ready to go when it’s needed. Be sure to plug the float switch back in as well, or your basement could be at risk of flooding if the pump doesn’t activate when it’s needed. Also, be sure to check that the discharge line leading outside is extending at least 20 feet from your home and isn’t clogged with debris.

Test the Pump

The sump pump is designed to divert water away from your home, preventing flood damage. To do this, it is necessary for the pump to be in working order. When a sump pump is not in working order, water can cause structural damage to your home. To test the operation of your pump, fill the pit with water and see if it turns on and begins to drain. In addition, be sure to check the discharge pipe to ensure that it is properly directing the water away from your home.

Make a note of the time when you perform this test so that you can track the pump’s performance over time. This can help you notice a decrease in efficiency or functionality that you can address with routine maintenance or repairs.

If your pump does not turn on, there could be a problem with the float switch. This may be because it is stuck in the “on” position, or because it is damaged. Alternatively, the float switch might be clogged. Check the float switch and clean it if needed. Then, test it by dumping a bucket of water into the pit and watching to see if the pump activates.

Another problem that can occur is when the pump overheats. This can be caused by a build-up of chemicals or iron. Regardless of the cause, this issue can be prevented by removing the cover and cleaning the pump with a brush. You can also flush the pump with a garden hose to remove built-up gunk and chemical residue.

The impellers of the pump can also become damaged over time, causing them to rotate unevenly and cause vibration and noise. Inspect the impellers for signs of damage. If they are damaged, it is a good idea to replace them.

Lubricating the bearings is another important aspect of routine maintenance for your sump pump. This can reduce friction and improve the overall function of your pump. Consult the manufacturer’s manual for detailed instructions on how to lubricate your specific unit.

Finally, it is a good idea to consider a battery backup for your sump pump. This can ensure that the sump pump remains functional during a power outage. This is especially important if you live in an area prone to severe storms or flooding during heavy rains.

Clean the Pit

A sump pump pit should be cleaned and inspected at least once a year. To do this, remove the pump and clean it thoroughly. This includes cleaning the grate, draining pipes, cleaning the float screen or inlet opening, and inspecting the power source to make sure its cord is in good condition. Then, put it back into the pit, filling it with water to keep it from running dry. It’s also a good idea to have a professional inspect your sump pump at least once a year. The professional will check six things, including the pit size, drainage pipes, a backup power source, and the discharge pipe and check valve.

Performing these routine tasks will help ensure that your sump pump can work properly and keep your basement safe from flooding and other problems. If you are not comfortable doing these maintenance tasks yourself, a plumber can help. They can also perform a full inspection and cleaning before the rainy season begins.

To perform these tasks, start by disconnecting the power to your sump pump and any other accessories, such as a battery backup. This prevents electrical mishaps and burns. Next, unscrew the bolts or screws that connect the pump to the discharge pipe. If there is any resistance, a lubricant such as WD-40 can help ease the separation. If there is any mould growing between the pump and the discharge pipe, scrub this area with disinfectant. After you’ve separated the pump and the pipe, inspect the bottom of the pit for solid debris that can clog it.

When you’ve finished, clean the pump and the pit thoroughly with a wet/dry vacuum cleaner. This will help remove any remaining sediment, dirt, and grime, as well as a sludge that builds up. Then, rinse the pump with a garden hose outdoors. Finally, clean the float switch and its connecting wires to make sure they are free of twigs, leaves, or other debris.

Once everything has been cleaned and inspected, it’s time to reconnect the power and test your sump pump again. Simply dump a bucket of water into the pit and observe how the float and valve respond. Once the water is removed, you can be confident that your sump pump is ready to protect your home from moisture issues this spring.

Navigation